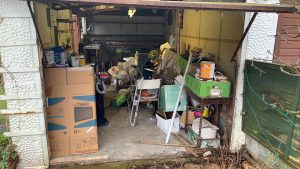
Clearing a cluttered garage can seem like a big job, but with the right plan you can get it done in a weekend. Here’s how to make the most of your garage storage, create a layout and establish a routine so it doesn’t get cluttered again.
Step 1 – Plan Ahead
A little planning goes a long way so take some time to think about your goals. Do you want a garage to park in? Extra space for hobbies? Just room for storage solutions for seasonal items?
Assessing the cluttered garage can help in setting a timeline and breaking down tasks, making the process more manageable. Write down your goals, what needs to be sorted and how you will get rid of the rubbish.
Get your cleaning supplies like a broom, mop, paper towels and a pressure washer or shop vac for the garage floor clean.

Assessing Your Garage
Before diving into the cleaning process, it’s essential to take a step back and assess your garage. This initial evaluation will help you identify areas that need attention and create a focused plan. Start by examining the condition of the garage floor, walls, and ceiling.
Are there any cracks, stains, or signs of wear and tear? Next, take stock of the amount of clutter and disorganization. How much stuff is piled up, and what types of items are taking up space?
Consider the type and quantity of items stored in your garage. Are there old cardboard boxes filled with forgotten belongings, or is it mostly sports equipment and gardening tools?
Assess the availability of storage space and solutions. Do you have enough shelves, storage bins, and hooks to keep everything organized? Finally, check the condition of the garage door and windows. Are they in good working order, or do they need some maintenance?
This thorough assessment will help you prioritize tasks and set realistic goals for your garage cleaning and organization project.
Setting Clear Goals
Setting clear goals is crucial for a successful garage cleaning and organization project. Start by asking yourself what you want to achieve.
Do you want a clutter-free space to park your car, or are you looking to create a dedicated area for hobbies and projects? Identifying your priorities will help you stay focused.
Consider your non-negotiables. Are there certain items you absolutely need to keep, or specific areas that must remain accessible?
Establishing these boundaries will make decision-making easier. Next, think about your budget. How much are you willing to spend on storage solutions, cleaning supplies, and any necessary repairs?
Finally, set a timeline for completion. Breaking the project into manageable steps with deadlines will keep you motivated and on track. With clear goals in mind, you’ll be better equipped to tackle your garage cleaning project and achieve the organized space you envision.
Garage Door Considerations
The garage door is a critical component of your garage, and it’s essential to consider its condition and functionality during the cleaning and organization process.
Start by checking if the garage door is in good working condition. Does it open and close smoothly, or are there any issues with the mechanism?
Inspect the garage door springs and tracks. Are they clean and well-lubricated? Proper maintenance of these parts ensures the door operates efficiently.
Check the seals and weatherstripping around the garage door. Are they intact and providing a good seal against the elements? This is crucial for keeping your garage weather-tight and energy-efficient.

Ensure the garage door opener is functioning correctly. Test the remote and wall controls to make sure everything is working as it should. Finally, look for any signs of wear and tear on the garage door itself. Addressing these issues promptly will prevent further damage and ensure your garage door remains secure and reliable.
By taking the time to assess and maintain your garage door, you’ll ensure it continues to function properly and provide a secure, weather-tight seal for your garage.
Step 2: Clear the Cluttered Garage
Start by emptying the whole floor. Removing everything will help you see what you have in your garage storage space and what you can keep. Taking inventory and streamlining your own garage can improve functionality.
- Sort by Categories: As you remove items, put them into piles – keep, sell, donate or discard. For smaller items like small tools, parts or holiday decorations, group them into boxes for easy handling.
- Large Items: For big items like sports equipment, gardening tools and storage bins, do they still need to be kept or can they be replaced with smaller versions?
- Hazardous Materials: Garages can hold hazardous materials like old paint cans, motor oil or insecticides. Research how to dispose of these items safely rather than putting them in the regular rubbish
Step 3: Deep Clean the Garage Floor
Now the garage is empty it’s time to deep clean. Start with the floors and garage doors to get the space looking fresh.
- Sweep and Mop the Floor: Sweep thoroughly then use a pressure washer or hose to get grime off the garage floor. For oil stains sprinkle kitty litter to absorb the oil.
- Clean the Garage Door and Windows: Don’t forget to wipe down the garage doors and any garage windows.
- Dust and Scrub Surfaces: Use a wire brush or warm water to scrub down rusty tools or storage shelves.
Step 4: Re-Organise Storage
Now you have a clean garage space you can make the most of your storage with solutions designed for use.
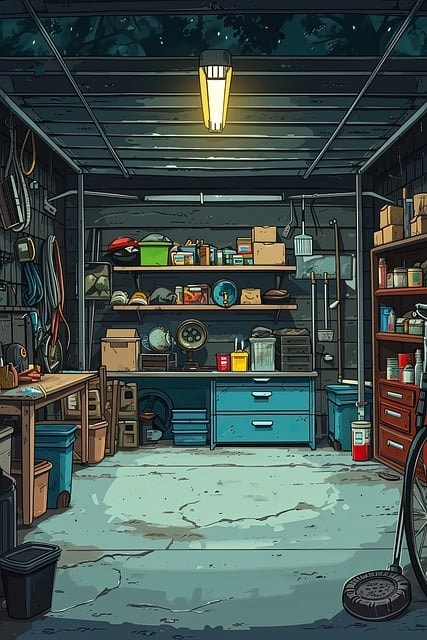
- Vertical Storage: Use high shelves, adjustable shelves and storage units mounted on the walls. Hanging hooks or pegboards are great for keeping tools or sports equipment off the floor and within reach.
- Overhead Storage: Use the garage ceiling to store items you don’t use often or seasonally like holiday decorations. High shelves or ceiling racks are great for storage above eye level.
- Use Wall Space: Install pegboards or wall hooks to create areas for gardening tools, sporting goods and cleaning supplies.

Step 5: Organise and Store with Storage Solutions
Now you’ve cleaned the garage and set up storage solutions it’s time to put items back with purpose.
- Group by Use: Create areas for similar items. Gardening supplies in one corner, sports gear in another and cleaning supplies near the entrance for easy access.
- Use Storage Bins for Small Items: Clear storage bins make it easy to see what’s inside, small items like nuts, bolts or crafting supplies can be kept together. Label each bin for easy reference.
- Store Seasonal and Infrequently Used Items Up High: Use the garage ceiling or high shelves for items you won’t need year round.
- Create Floor Space for Large Items: Leave the floor clear for big items or future projects. Having the floor clear makes it easier to access other storage areas and prevents clutter building up
Step 6: Sell, Donate or Dispose
Now you’ve identified items to get rid of it’s time to get rid of them.
-
- Sell Valuable Items: Consider listing gently used tools, sporting goods or furniture online. Sites like eBay, Gumtree and local marketplaces make it easy to find buyers.
- Donate Useable Items: Many charities will accept items in good condition like cardboard boxes of books, toys or home goods.
- Dispose of Unusable Items: For anything that’s not sellable or donate worthy consider rubbish removal options.
Step 7: Maintain Your Clean Garage
After all that work over the weekend keep your newly clean garage tidy by setting a maintenance routine.
- Clean the Garage Floor: Every month sweep and inspect the garage floor for new stains or spills.
- Reassess Your Storage Solutions: Over time you may need to adjust your storage solutions for new or changing items.
- Remember Rubbish Removal: Make a habit of removing unwanted or broken items straight away instead of letting clutter build up.
- Check the Garage Door and Windows: Regularly check the garage doors and garage windows for dust or damage. Keeping these clean makes the whole space look brighter.
By following these steps you’ll have a clean garage that’s functional, organised and easy to maintain. Enjoy your tidy garage and all the extra space it gives you!